
How to Use Trekking Poles – Mount Rinjani is not the kind of mountain where you can simply walk and forget about your equipment. The terrain changes quite a lot throughout the journey, from rocky trails and firm soil to loose sand during the summit attack. That is why knowing how to use trekking poles properly can make a real difference during the hike.
Many hikers already know that trekking poles can help maintain balance and reduce pressure on the legs. However, there is another thing you should understand before taking them to Mount Rinjani: the bottom part of trekking poles usually comes with several features designed for different types of terrain.
There is a metal tip, a rubber tip, and a basket. Each one has a different purpose. If you use the wrong feature, your trekking poles may not provide the grip and stability you need.
So, before you hike Mount Rinjani, make sure you understand how each feature works. Save this guide first, then practice using your trekking poles before the actual hike.
How to Use Trekking Poles Properly on Different Terrains of Mount Rinjani
Here is how to use the features on your trekking poles according to their functions. Some hikers may already know this, but if you are still not sure, this is a good time to learn.
1. Carbide Tip
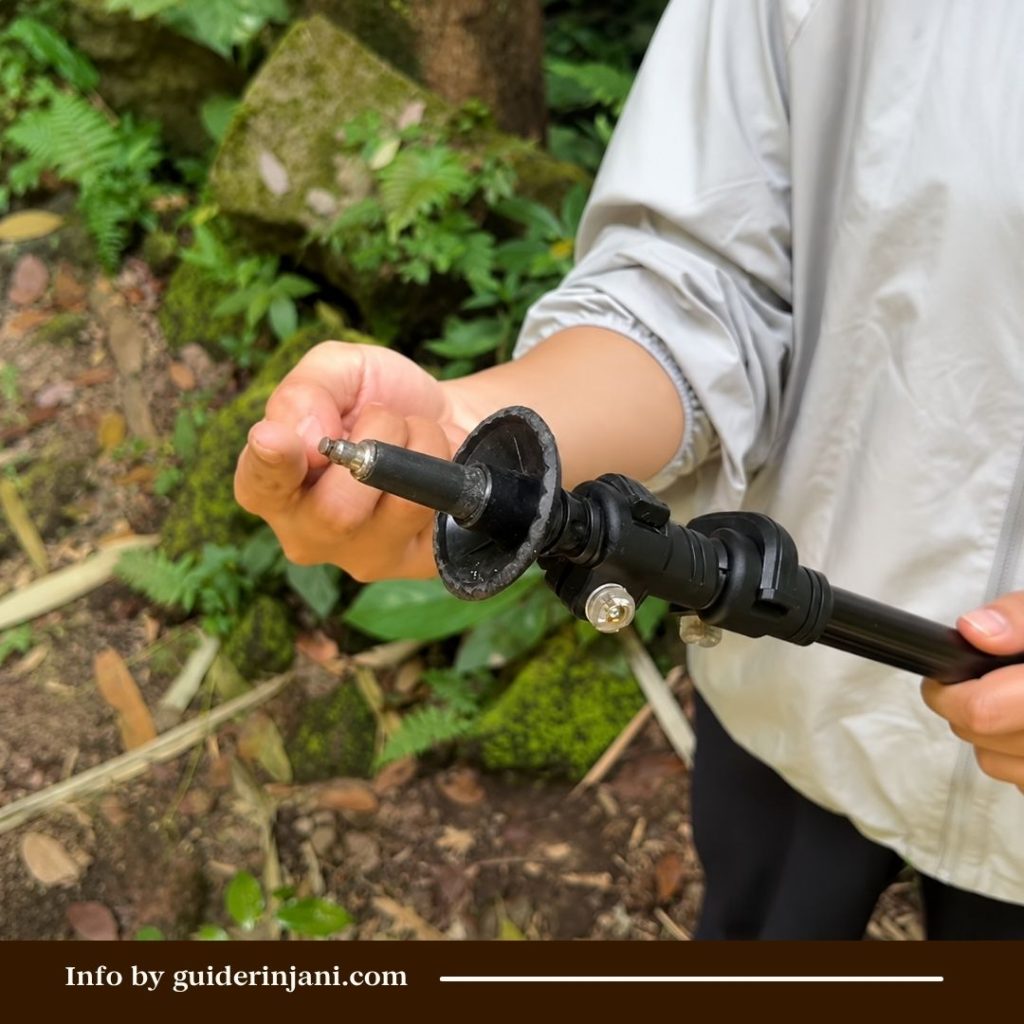
The carbide tip, or metal tip, is the part you should use when walking on firm soil or small rocks. The metal tip can create a stronger grip against the ground, making it useful when the trail is relatively hard and you need extra stability. On Mount Rinjani, you may encounter this type of terrain in several sections of the hiking route.
Simply place the tip firmly on the ground before taking your next step. Do not swing the trekking poles too far in front of your body because you may lose your balance.
The goal is not to make your trekking poles carry your entire body weight. Instead, use them as an additional point of support while maintaining a natural walking rhythm.
Also read: Looking for a Rinjani Trekking Tour Company? Pay Only $195 Here!
2. Rubber Tip
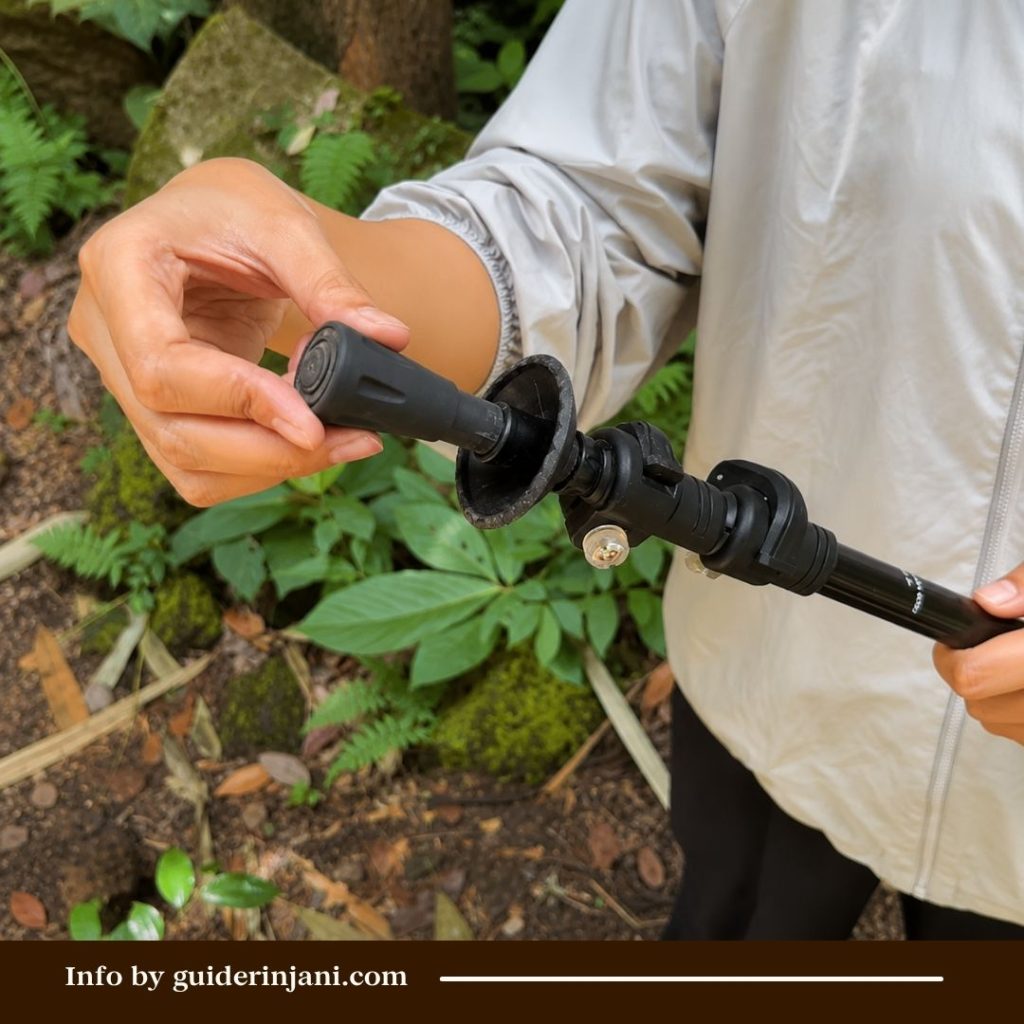
What if you are walking on a smooth and slippery rocky surface? This is where the rubber tip becomes useful.
If the trail consists of smooth rocks, you do not necessarily need to remove the rubber tip from your trekking poles. The rubber can provide additional grip against smooth surfaces and help prevent the metal tip from sliding too easily. There is another benefit that is easy to overlook. The rubber tip also protects the metal tip underneath it from direct contact with hard surfaces, helping reduce unnecessary wear.
So, before you immediately remove the rubber tip, check the terrain first. If you are dealing with smooth or slippery rocks, keeping the rubber tip attached can be a better option.
3. Trekking Pole Basket
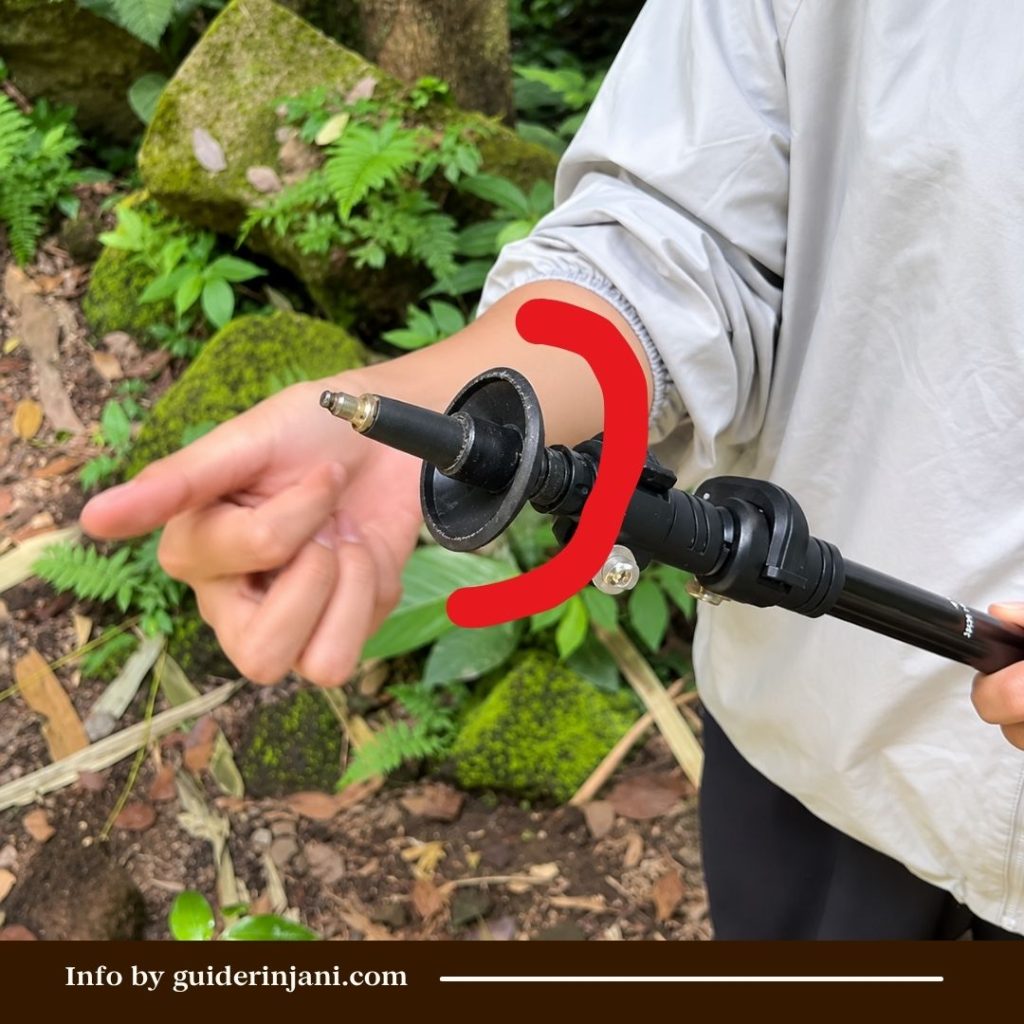
Have you ever noticed the round-shaped part near the tip of a trekking pole? That part is called the trekking pole basket.
The basket is designed to prevent the trekking pole from sinking too deeply into soft surfaces such as loose soil, sand, mud, or light snow. This feature becomes particularly useful when you are doing the Mount Rinjani summit attack.
The summit route is known for its loose and sandy terrain. Without the basket, the trekking pole tip can sink too deeply into the ground, making each step less efficient. The basket helps stop the pole from going too far down, allowing you to use it more effectively as support.
There is another small but important technique when using trekking poles. Do not grip the handle too tightly. Holding the handle too firmly for a long period can make your hands and arms tired faster. Instead, keep your grip relaxed and let the trekking pole straps help support your hands.
Put your hands through the straps properly so some of the pressure can be distributed through your wrists. This can make a long hike feel more comfortable, especially when you need to use your trekking poles continuously.
4. Other Tips: Uphill and Downhill Techniques
Using trekking poles is not only about choosing the correct tip. You also need to adjust their length according to the terrain.
When walking on relatively flat terrain, adjust your trekking poles so that your elbows form approximately a 90-degree angle when holding the handles. When walking uphill, shorten the trekking poles slightly. This adjustment allows your arms to stay in a more comfortable position while climbing.
Meanwhile, when walking downhill, make the trekking poles longer. The additional length can help you reach the ground more comfortably and provide better support as your body moves downward.
Most importantly, always check the locking mechanism before starting your hike. A trekking pole may look properly adjusted, but if the locking system is not secured correctly, its length can suddenly change when you put pressure on it. That can affect your balance and potentially cause you to stumble.
So, after adjusting the length, make sure every locking section is firmly secured before continuing your hike.
Knowing how to use trekking poles correctly may seem like a small thing, but it can make your Rinjani hike more comfortable and controlled. The key is to adjust your equipment according to the terrain instead of using the same setup throughout the entire journey.
Also read: 5 Clothes You Should Never Wear When Trekking Mount Rinjani
Want to Hike Mount Rinjani for Only $195? Sign Up Here!

If you are planning to hike Mount Rinjani, you may also want to look at the trekking package offered by Irwan Trekker, a trekking company serving Mount Rinjani hikers.
One of their offers starts from $195 per person for a Rinjani trekking trip that includes the summit. The package also covers several services, including airport pickup and transportation back after the trip.
However, there are conditions that you need to understand before getting too excited about the price.
1. For Large Groups
The $195 offer is intended for a relatively large group, around 10 people in one group. Each person pays $195, which means this package can be an attractive option if you are traveling with friends, family, or a hiking community.
So, if you want to take advantage of this affordable package, start gathering your hiking buddies. The more people in your group, the easier it is to meet the group requirement.
2. For Fit and Experienced Hikers
There is another important condition: the trip is scheduled for 2 days and 1 night. A two-day Rinjani trek is not necessarily suitable for everyone. With such a short schedule, you will have limited time to rest and may need to maintain a faster pace throughout the journey.
The schedule also requires you to reach Sembalun Village before noon on the second day. Because of this, the package is better suited to hikers who are physically fit, have good endurance, and are comfortable with a demanding hiking schedule.
Ask yourself honestly: Are you ready for it?
If you meet both requirements—joining a large group and having sufficient physical endurance—the package may be worth considering if you are looking for a more affordable way to hike Mount Rinjani.
To register, you can contact Irwan Trekker through their WhatsApp, email, or Instagram. The payment system allows you to make a 20% deposit, with the remaining balance paid when you arrive at the pickup point using Indonesian rupiah.
So, before heading to Rinjani, prepare not only your trekking poles but also your physical condition, hiking schedule, and equipment. Understanding how to use your trekking poles properly can help you move more confidently across Rinjani’s changing terrain—and make the challenging parts of the hike a little easier to handle.